Outdoor Lighting: How to Design a Garden Lighting Scheme Pt. III
In this final article on outdoor lighting, we will look at a real scheme. In the first article we looked at the different outside lights, such as uplighting, downlight, path lighting moonlighting In the second article on garden lights we covered the different fittings and the choice of lamps. Now we will put it all together and look in detail how you design a garden lighting scheme in practice. This is a 4-acre garden I am currently working on in Oxfordshire England.
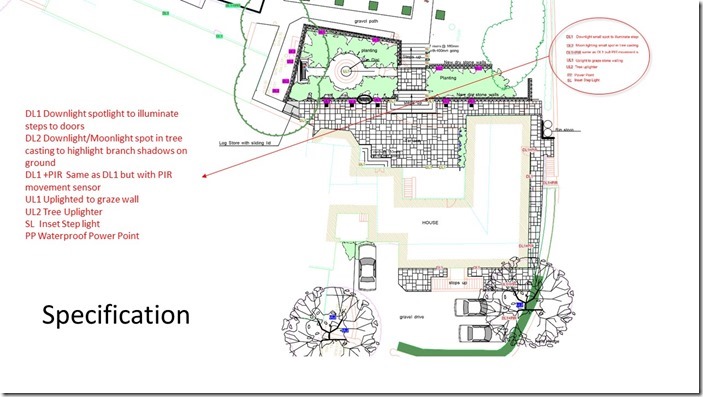
I have designated 6 types of fitting to include 3 types of downlighter 2 types of Uplighter and 1 type of step light. Let us take a closer look at the individual areas and look at why I chose to light what I did
Outdoor Lighting: The Front Garden
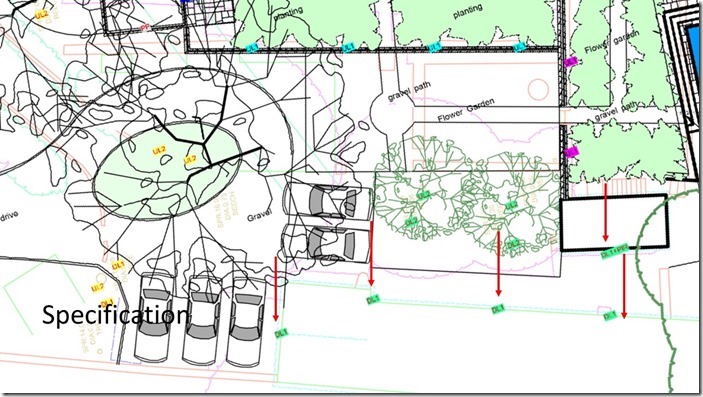
In the front, we have 2 Trees. The tree on the right I have placed 2 uplights to illuminate both the truck and the branch structure
The tree on the right has one up-lighter to illuminate the trunk and two moonlight downlighters with PIR to create moonlight effect when people arrive on foot or by car
In addition to these, there are 2 downlights high up under the eaves of the house shining down on the steps and the front door area
Outdoor Lighting: The Side Passage
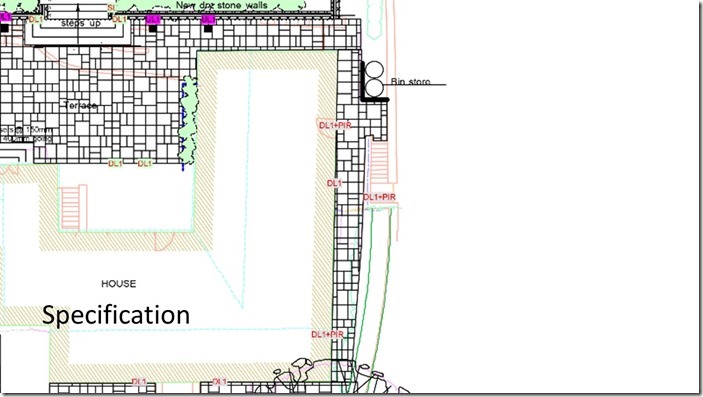
Moving on the side access has 4 downlighters
the first in again placed in the eves above the back door to illuminate the entrance
the other 3 are on PIR’s the first two against the house to proved security and access lighting
and the 3rd to illuminate the back steps down into the street
All of these lights at the front and the one above the side door are on the same circuit
Garden Lighting: The Rear Patio
Continuing round to the rear terrace. This should be the most highly lit area of the garden, as it the space most likely to be used for evening entertaining and also provides views from inside the home – out
As I have made it abundantly clear I am not a fan of overlit gardens. The majority of slides I have shown today, I personally feel have too many fitting with too higher wattage lamps, but that boils down to taste
Personally, I would preferer to add candles to tables to provide additional table lighting, rather than trying to replicate how we light our internal kitchens and dining rooms.
I believe that the contrast between light and shadow is far more exciting then floodlight the whole space. As a consequence, some of you may consider my terrace area under-lit?
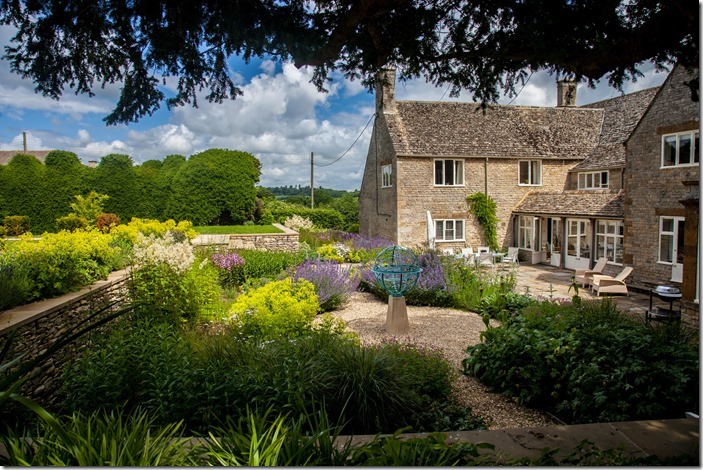
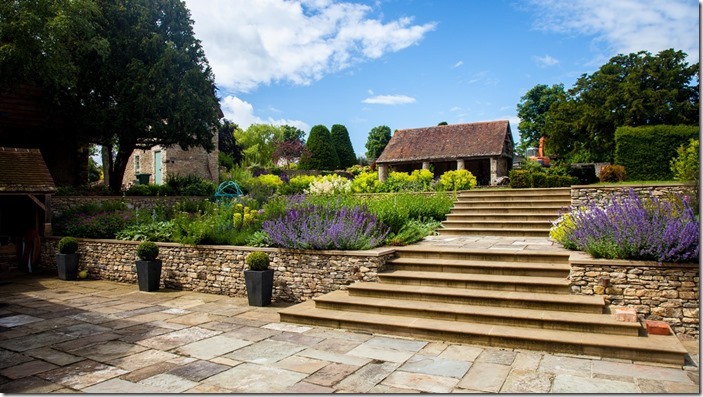
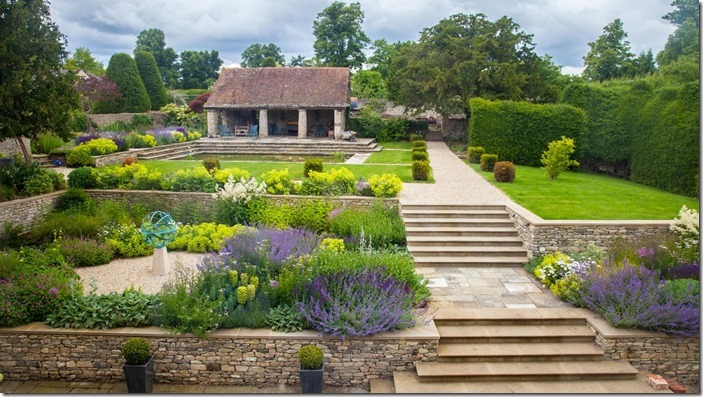
The building is made of Cotswold stone with a large york stone eating and entertain area between the house the and planting
As you can see from the slide The house has a series of dry stone walls and is situated on several levels
There are two flights of steps which take you up on to an expansive lawn area and gravel paths lead you to both the kitchen garden at the far end and to the staff cottages to the left
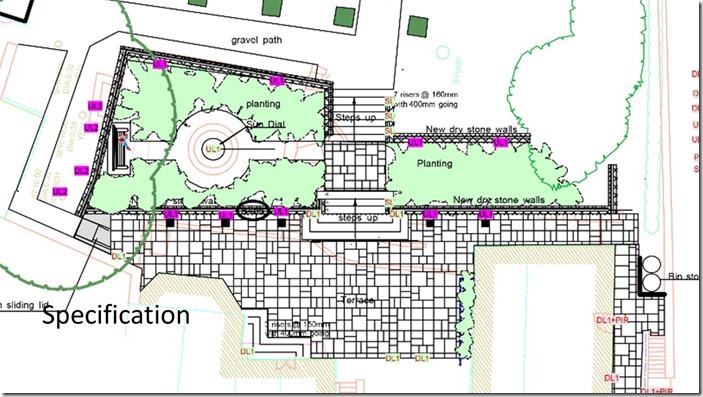
In the foreground are a series of pots with up-lighters behind. You can see from the there are five recessed up-lighters in the paving
These not only create a V-shaped wash of light over the dry stone wall but also serve to silhouette the planters
On the second retaining wall, there are a further 4 up-lighters that again create a wash of light and these also silhouette the planting in front
Both walls are on the same lighting circuit and are dimmable and controlled from the conservatory
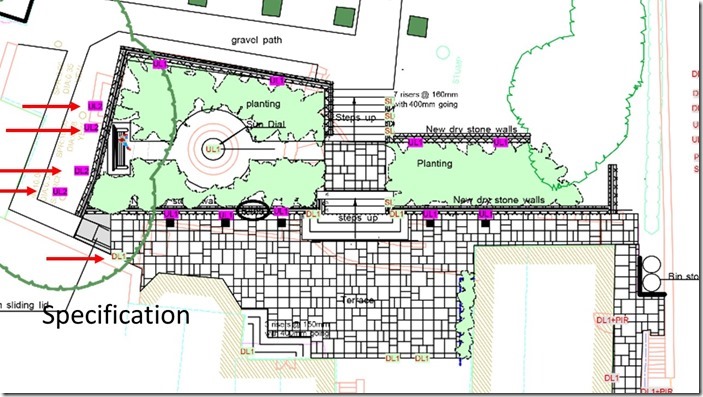
To the left-hand side are two well lights and two moonlight spots to help illuminate the side path from the cottages
There is also a wall light on the steps to highlight eh levels change
all these lights are on their own circuit
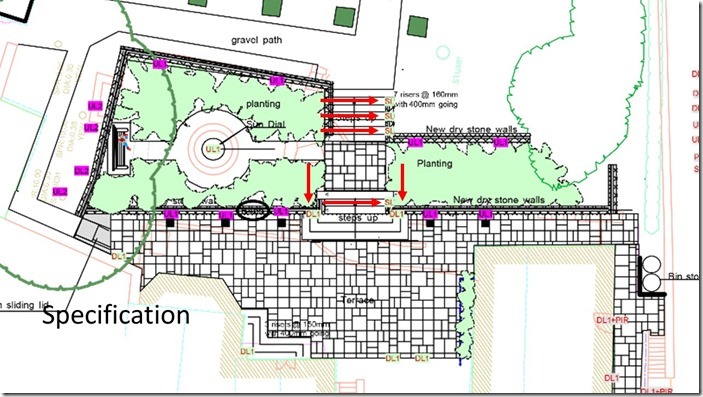
On the main steps, we have two wall lights to light the front portion of the stairs
Then we have another 4 inset stair lights every other tread, to safely light the both flights
All the step lights are on the same circuit and all are dimmable
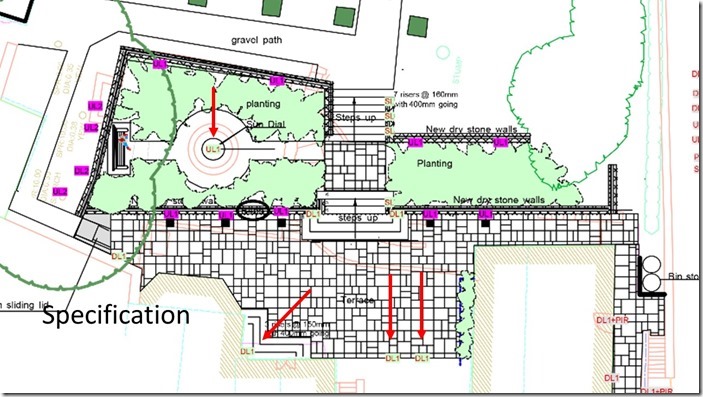
Finally, there are downlights two above the conservatory doors and the third in the eves to light the steps from the drawing room
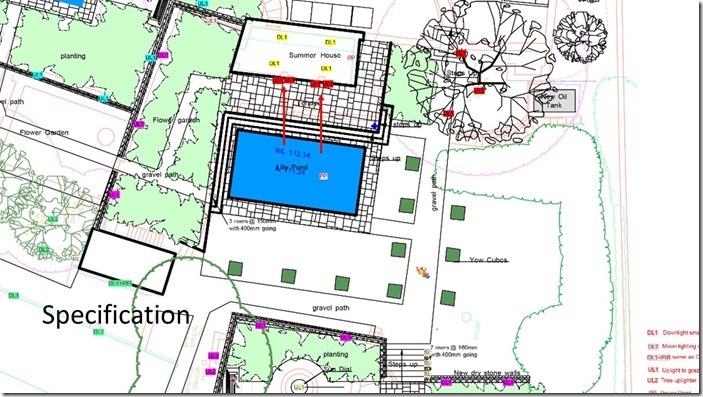
Finally, we have one uplight to light the armillary sphere which again can be seen from the house at night
While I am sure there are plenty of lighting designers, who would have specified path lighting. Particularly along both gravel paths in front the of the yew cubs. I didn’t want this.
Primarily because as you can’t see it from the house. And the number of times a year it would likely be used, you could count on one hand.
Outdoor Lighting: The Summer House
Instead, we decided to light the summer house, back wall and the far tree by the entrance to the kitchen garden. You can still see them from the house and would help give the garden a sense of depth at night. Inside the summer house, we lit the roof void highlighting the underside of the tiles which created a wonderful soft glow
To the front, we light the centre two columns of the summer house with 2 uplights each. This helped emphasised their shape and in addition, we install 2 sets of power points
One for the pond pump and one to service the summer house
We then uplight the wall with 3 spike mounted spots and silhouetted the planting
Finally up lighting the tree and moonlighting the steps to the vegetable garden
Outdoor Lighting: The Staff Cottages
Moving through to the staff cottages we place a single down lighter and PIR on the dovecot
And a further 4 downlights above the doors
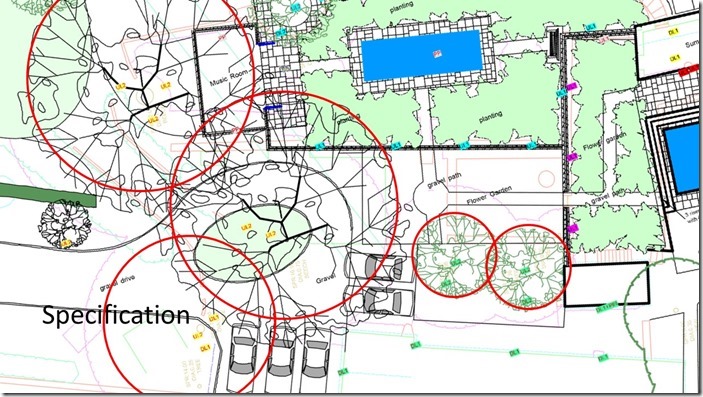
Next, we moonlit 2 cherry trees and three further beach trees with up-lighters to highlight the rear parking area
For the tennis course area, we uplight the 5 new cherries on the right. As well as the mature cherry by the music room. Which we both up lit and moonlight to provide illumination for the seating area.
The last bit of the puzzle is the 6 new cherry trees along the new back drive entrance.
For the moment they are just up lit. But in 10 years once they grow taller the plan is to add moonlighting to illuminate the gravel drive. Finally, at the very top, we have a mature willow. This is both uplight and moonlight to illuminate the drive entrance.
The total cost of this scheme as around £10K for fittings and the same again for the wiring and labour. You should put aside between 5-10% of the budget for garden lighting. This may sound a lot but why invest all that money in a garden and only see it during daylight?
So I hope that’s been some help. And you feel more confident in playing an active part in your lighting design of your gardens in future.
What we still haven’t discussed, is what beam spread and bulb strength to use in each fitting. But that is sometimes just down to trial and error. You need to experiment on site, to see which give the best effect
See Also
OUTSIDE LIGHTS: HOW TO DESIGN A GARDEN LIGHTING SCHEME PT. I
GARDEN LIGHTS: HOW TO DESIGN A GARDEN LIGHTING SCHEME PT.II
Are you interested in becoming a professional garden designer, or you’re already in the industry and need to further your training? Check out our garden design courses online. Our flagship garden design diploma course, our Construction, Business and professional practice course and our Planting Design Diploma Course

