
Garden lights: How to Design a Garden Lighting Scheme Pt.II

In Pt. 2 of this three-part article on How to Design a Garden Lighting Scheme, we look at garden lights, the fixtures, what they are and how they are used.
Garden Lights: Spot Lights
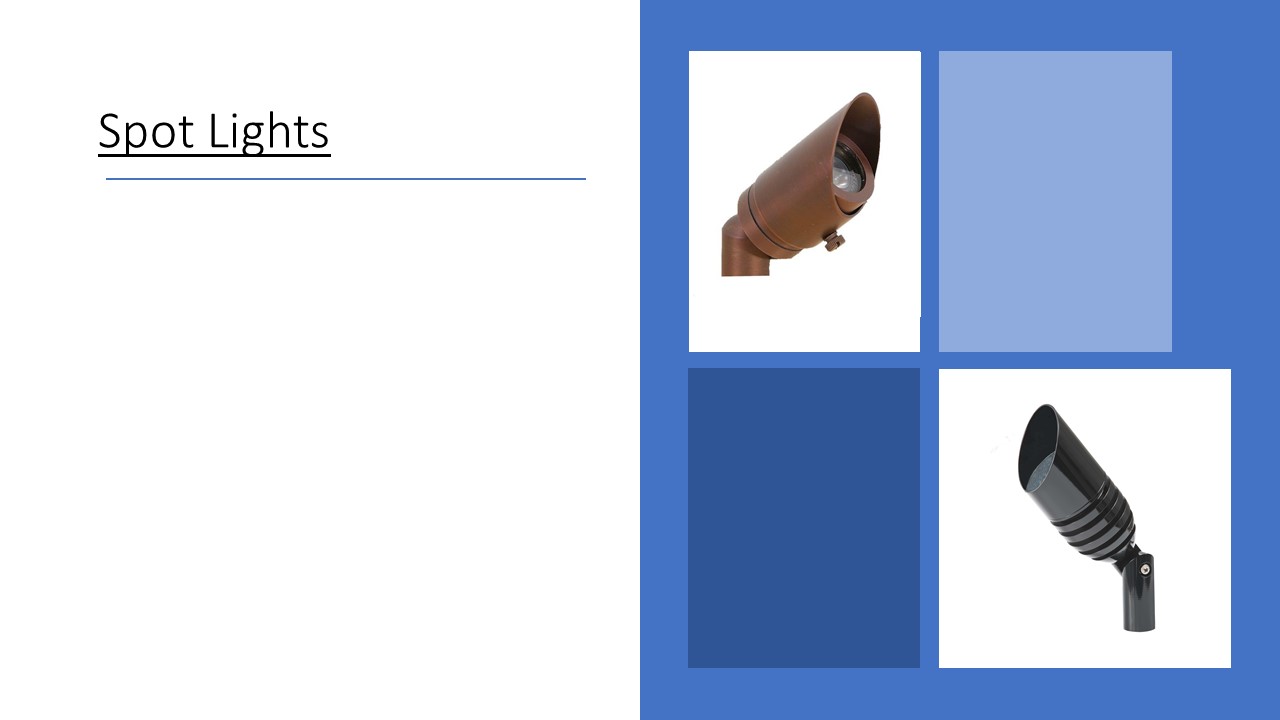
The fixtures pictured above are examples of bullet-style spotlight fixtures. The one on the left is in a bronze finish and the one on the right is in a black finish. They can be mounted on the ground using stake mounts. Or can be hard mounted using adjustable angle base brackets when on hard surfaces or trees.
These fixtures can utilize either 2-pin halogen, incandescent or LED bulbs up to 20 watts. If more light is required, these fixtures can employ MR-11 or MR-16 incandescent bulbs. Or GX5.3 or GZ4 LED bulbs up to 100 watts. With their integral reflectors further focusing the light, for more powerful illumination.
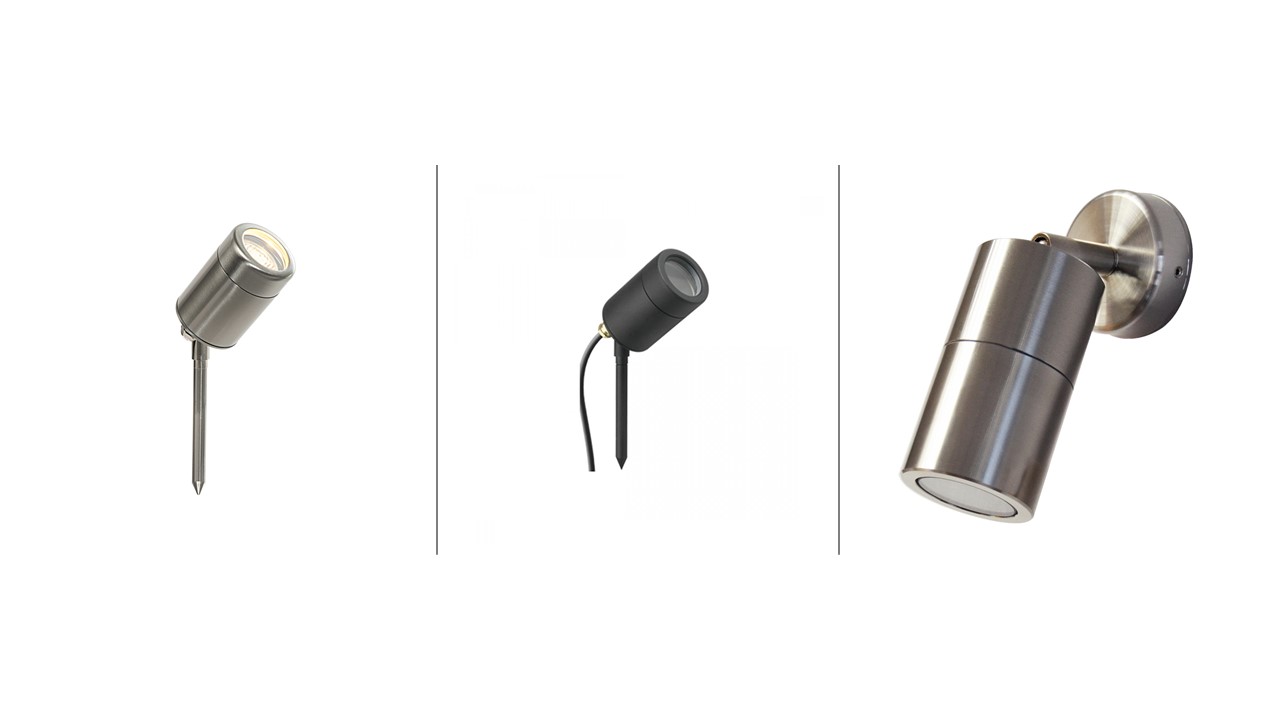
These types of fixtures are very useful for illuminating focal points of a property or for an uplighting application. These techniques and others to be mentioned will be further explained towards the end of the article. Bullet fixtures are usually narrow (<30 degrees) in illumination pattern. When they exceed the angle they are known as floodlights. These are usually high wattage fixtures designed to illuminate a larger area.
See also OUTSIDE LIGHTS: HOW TO DESIGN A GARDEN LIGHTING SCHEME Pt 1
How many spotlights make up this lighting scheme?

If you can count 15 do are doing well. There are 11 ground-based spots used to uplight the porch posts and gutter pelmets. Notice they place the lights in between the windows and not under them. Light under widows leave dark ugly shadows and is to be avoided at all costs. The other 4 lights are on the roof. 3 lighting the dormer windows and one on the right light the roof pitch
In addition to the spotlights, there are also 4 path lights in the front borders.
These fixtures are some examples of path lights. These are my least favourite form of fixtures as they go against my personal philosophy of only seeing the lighting effect and not the source. My argument would be, that with all the additional house lighting, these 4 path light are surplus to requirement. As even on the darkest nights the path will still be clearly visible. What is missing from this installation are step lights. An overhead downlight would have made all the difference. Personal taste enters in here, as there are literally hundreds of styles to suit every taste and budget.
Garden Lights: Path Lights

Most path lights are still light bulbs reflected down. Lighting a circular area on the ground and surrounding lateral area. The best fixtures are those suitable for full cut-off applications. Where the primary goal is to generate a spot of light on the ground and not have too much lateral lighting effect.
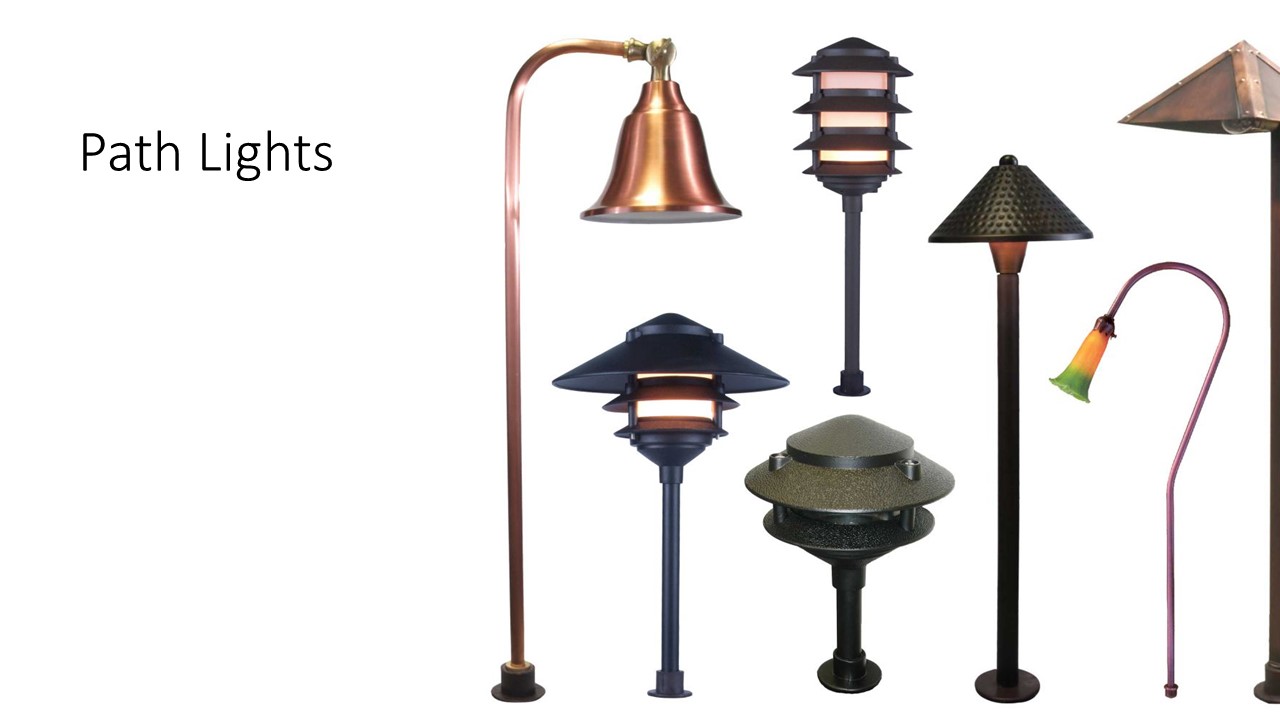
The Chinese lantern style lights and the glass tulip above would be classified as semi-cut-off or non-cut-off depending on the opaqueness of the glass in the tulip. The cut-off fixtures would be used to illuminate a path or drive. Where the semi or non-cut-off fixture is used to illuminate both the path or drive. As well as some of the surrounding area such as a flower bed or entryway.
The examples illustrate the full cut-off or partial cut-off applications. But as you can see there is still an awful lot of light bleed from the fitting
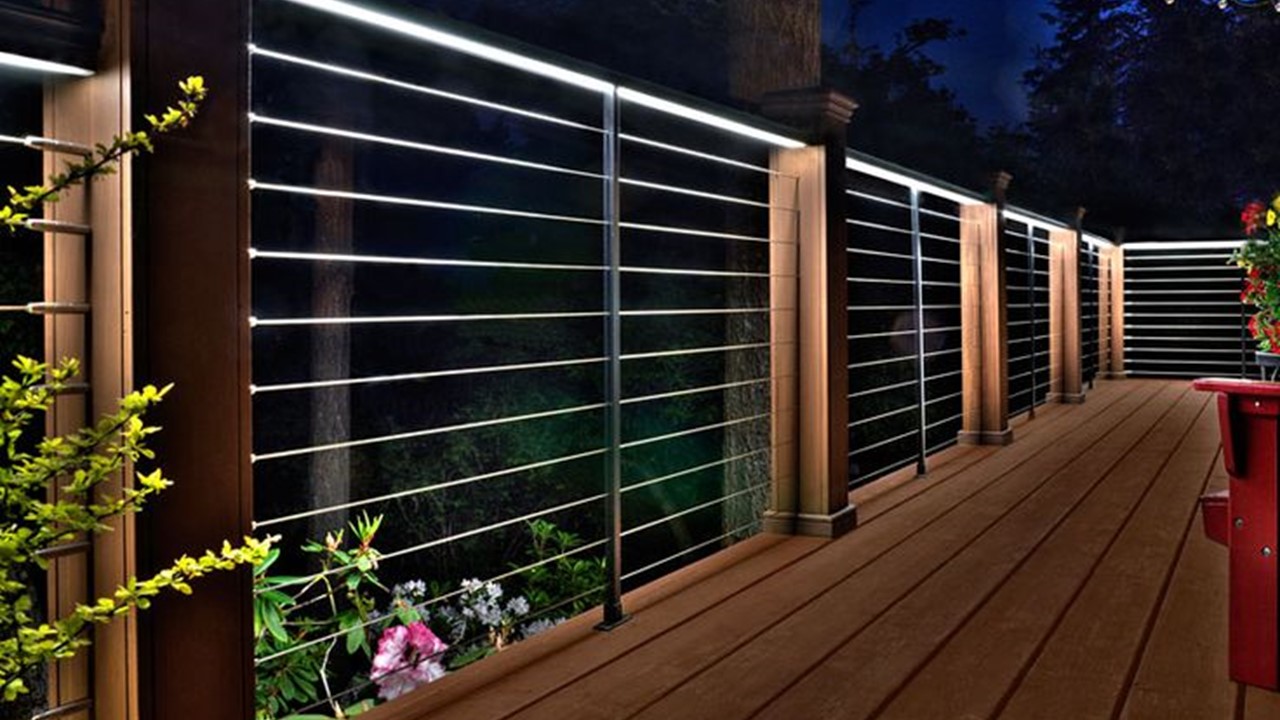
Whereas these path lights are both inconspicuous and create a beautiful pattern along the concrete path. The lamp brightness is not too much and the number of fittings is understated but sufficient to do the job.
Garden Lights: Accent Lights
The concept of accent lights is to be seen and not to see by. They act as boundary markers or guides. The fixtures on the left are deck lights designed to mark the edge. Next are some round spike lights that are short and low to the ground. The application is in showing you where the extents of a path width are when you are on the path.
The taller fixture on the right indicates the location of something you are trying to find from some distance. Sometimes they are used in public places such as parks located next to key objects such as benches or trash containers.
Why anyone would need to have a string of landing lights like some airport runway, is beyond me.
While this installation looks like a UFO has landed and you are expected to climb the steps to the mother ship – but each to their own?
Garden Lights: Well Lights/ In-ground Lighting

The fixtures are examples of well-lights sometimes know as in-ground lighting. These lights are used for applications where a fixture cannot protrude above ground level, such as on a lawn or on a pavement where there is pedestrian traffic.
They are called well lights because they sit in a recessed well that you dig in the ground. The fixture on the left is used where clearance is important and non-obscured illumination is desired. The fixture on the right is ruggedized to take more punishment. These are typically used for up-lighting applications where lawn care equipment must pass over without damaging the fixture. These fixtures can use 2-pin, MR-11 or MR-16 lamps depending on the manufacturer and application.
Garden Lights: Underwater Fixtures
The fixtures to the right are examples of underwater lights. Typically IP67 or IP68. The one on the right is suitable for burial in soft media such as sand or gravel or for embedding in concrete at the time of construction. The fixture on the left can be mounted on a hard, flat surface such as the bottom of a cement or resin pond.
Typical low voltage lighting applications deeper than 4-8 feet start losing their effect. These fixtures can use all bulb types mentioned dependent on the application.
Garden Lights: Step or Brick Lights

The fixture to the right are examples of step or brick lights/ These fixtures, like well-lights, are intended for flush mounting but differ in one aspect. The fixtures are typically intended to be mounted in vertical services such as the riser of a step or the side of a wall.
They usually include louvres to reflect the light down to illuminate steps or other features of interest and to prevent glare. There is nothing different about this fixture except for the louvres. These fixtures can use all bulb types mentioned but typically employ the lower wattage 2-pin bulbs.
It’s unnecessary to light every stair. The image on the right is an example of alternate stair lighting where shadow and highlight help emphasise the treads and the risers.
As an alternative consider lighting steps from above using a tight spot light to create a pool light to just pick up the change in level.
Garden Lights: Post or Wall Lights
Post lights can function as an accent light or a path light but is primarily used on fence posts to subtly light areas adjacent to fences or gates. They are typically low wattage and full cutoff or cutoff in configuration. They are usually used in a series with a post light being mounted on every post or every other post on a portion of the length of a fence or pergola.
Garden Lights: Mounting Techniques
There are four (4) basic methods for landscape lighting fixtures:
· Ground stakes – this technique is the most common for path, accent and spotlights mounted a ground level. The fixture is equipped with a metal stake and is “stuck” directly into the soil.
· Brackets or hard mounting – these techniques are used for mounting fixtures to walls, eaves, fence posts or other locations off the ground. The fixture or bracket that holds the fixture is screwed, nailed or otherwise fastened to the desired surface. This technique can be used for spot or flood lights and post lights for up-lighting, downlighting, spotlighting and, in the case of the post lights, accent lighting.
· Pole mounting – this technique is a variation of hard mounting. The fixture is mounted on a pole similar to a lamppost used in higher voltage applications. This is generally used for area or limited path lighting.
Burying – this technique is associated with wells lights in uplighting applications. As implied by the name, the fixture is recessed in a hole in the ground to be flush with the surface to avoid interference with operations such as walking or lawn mowing.
Garden Lights: Areas Enhanced by Landscape Lighting
- Specimen Trees Shrubs
- Planting Beds
- Pathways
- Architectural Features
- Home Facade
- Steps
- Decks
- Driveways
- Statuary Features
- Water Features/Ponds
The list above indicates some of the areas that would benefit from garden lights At the end of this lecture we will go through a real project and discuss exactly what light I chose to use and why
Burying – this technique is associated with wells lights in uplighting applications. As implied by the name, the fixture is recessed in a hole in the ground to be flush with the surface to avoid interference with operations such as walking or lawn mowing.
Landscape Lighting & Electrical Plan
The planning process should begin with a plan or sitemap. It should be drawn to scale, showing all landscape features and areas that need lighting. Fixtures and lamps are chosen for each area based on the desired effects …path lights for safe passage along walks and stairs, wash fixtures for silhouette effects against a wall, etc.
While its important to start drawing the lighting plan, its more important to think about what you want as far as lighting effects, areas and features to be illuminated, how much you have to spend and what your overall goal is.
Illuminate steps, paths, and driveways to increase foot traffic safety in the dark.
If you entertain outdoors frequently, consider low-voltage lights under handrails, stairs and bench seating
Don’t Overlight a Garden
One common mistake is to over light; low levels of light create subtle beauty and are often also sufficient for safety and security. Use brighter lighting effects for focal points. Consider the effects that different light intensities will have on the overall design.
Focus more on the desired effect of the lighting, rather than the specific fixtures you use. If the fixture is not featured as a design element, opt for less obtrusive fixtures that can be concealed or discreetly placed.
Poor design or installation can make for disappointing lighting, but components are important, too. Component failure (transformers, fixtures and wiring) can be a real problem. While you don’t want extremely cheap fixtures that will fail within two or three years, But you don’t necessarily need to buy the most expensive either.
The key consideration when assessing quality is durability. How long will a component last? Given the harsh conditions that exist outside a home throughout the course of the year? Winds, rain, sleet, snow, blistering heat or freezing cold are just some of the hazards your components need to withstand.
Garden Lights: Expandability & Flexibility
The lighting system should easily adapt to changes. New landscaping is typically dotted with young plants, bushes and trees. Does your lighting plan allow for adequate flexibility in the system? Can you easy repositioning lighting as your landscaping matures, grows or changes? Are you able to move a fixture to the correct lighting position as bushes grow? Or reposition plants, without needing to reinstall part of the system, is an important consideration.
Garden Lights: Lamp Choice
Achieve the desired effect with the correct light bulb. There are two variables to be decided upon when working on your landscape lighting plan. The distance the light must project, (affected by the inverse square law) and the diameter and shape of the area the light will illuminate. The distance a lamp must project is a function of the fixture’s distance from the tree, wall or sculpture. The diameter and shape of the area the light will illuminate is a function of the bulb’s beam spread. Directional fixtures offer a range of lamp wattage and beam spreads from Very Narrow Spotlight to Wide Flood.
While I said right at the beginning, this article wouldn’t teach you to become a professional lighting designer. Hopefully, it has to give you an insight into what options you have and what decisions need to be made. You are not qualified to produce a wiring plan and for this, you will need a qualified electrical contractor. What you can do however is decide what fitting you want in your garden and what type they should be.

