Outside Lights: How to Design a Garden Lighting Scheme
Outside lights are fundamental to any successful landscape scheme. In this 3 part article, we’ll discuss the different outside light fittings as well as their quality and durability. The different lamps available, as well as how, what and where to place outside lights for maximum effect.
The first thing you need to accept is that unless you intend to play night-time soccer, you don’t need to floodlight your garden. Neither will you want to do the same things at night, as you would do during the daytime. (And I’m not just talking weeding!). Even walking around the garden after dark is highly unlikely, so lighting every path or flower bed just isn’t necessary.
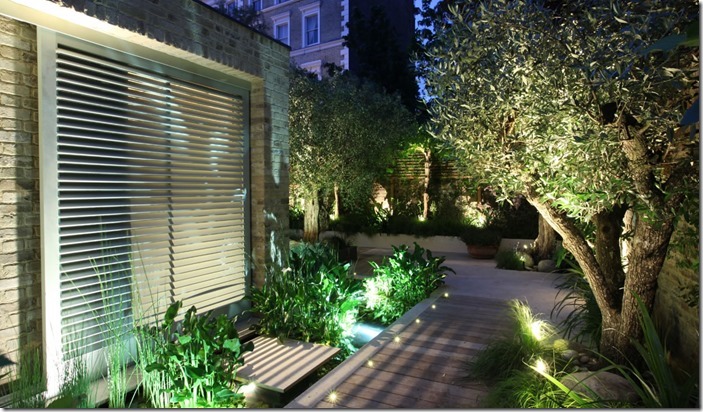
Instead, you should light the areas adjacent to the house. Then, depending on the size of your garden, choose some key features, such as a tree or sculpture, further out to help give the garden some depth.
99% of the time, the outside lights will be seen from inside. It will negate the need for curtains because Instead of looking out onto blackness, a beautifully lit garden can become a magical kingdom of silhouettes and shadows.
If the lighting designer is also the lighting supplier, the more fittings they sell the bigger their profit. That’s why it’s important that you understand the process and have strong ideas yourself, so you achieve the outcome you want.
Outside lights have 4 main functions
Access: To direct the safe movement of people around the property
Security: To discourage people entering the property uninvited
Usability: To allow the garden to be used at night as an extension of the inside
Aesthetics: To allow the landscape to be admired 24/7 from both inside and outside the house
There are 5 main types of lighting effect
Up-lighting, Downlighting, Spotlighting, Path Lighting and Backlighting and we will start with taking a quick look at each.
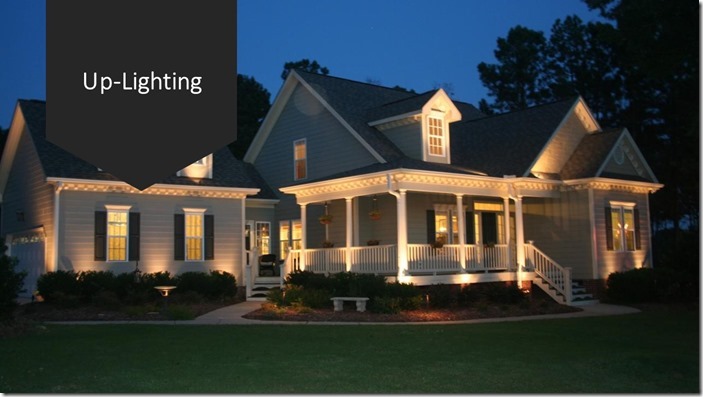
Architectural and landscape elements such as buildings, walls, fences and pergolas become dramatic features when illuminated from below. Especially when light sources can be hidden using flare shields or foundation planting.
I was taught from an early stage, that the best garden lighting – you only see the effect, not the fitting. In reality that’s not always possible, but it’s something to this day that I do my best to achieve.
A word of caution: Check with local authorities before you light the fronts of the building as you may fall foul of planning laws or possibly upset the neighbours.
See Also GARDEN LIGHTS: HOW TO DESIGN A GARDEN LIGHTING SCHEME PT.II
OUTDOOR LIGHTING: HOW TO DESIGN A GARDEN LIGHTING SCHEME PT. III
Outside Lights: Up-lighting
Up lighting focuses light and attention on an object from a low fixed location. The object can be a shrub, tree or architectural feature like a gazebo, arbour or wall sculpture.
The fixtures and lamp strengths are specified according to the mature size of the plant or the size of the hardscape area to be illuminated.
Well-lights are extremely effective for aiming light up a tree or column. They should be located 2 to 4 feet from the trunk base for small ornamental trees to light the canopy. Or for mature trees like Oak or Beech, close to the base and positioned so the light grazes the side of the trunk and illuminates the upper branch structure.
Outside Lights: Downlighting
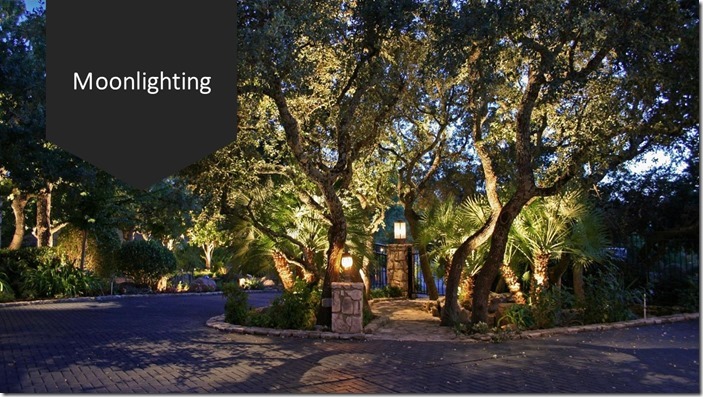
Another technique is downlighting or moonlighting. Usually accomplished with bullet type fixtures placed well above eye level on a structure (or even in a tree), this technique illuminates general areas for safety, security and aesthetics. Fixtures and lamps are chosen for the required brightness and width of illumination.
Special hanging fixtures known as “tree” fixtures are also available. You can also use downlighting to highlight a smaller area or single feature or to create a sense of perspective. Lighting from above can provide both security and aesthetics.
Outside Lights: Spotlighting
This technique uses a strong, narrowly focused beam of light.
Spotlighting is great for sculptures, statues, address number signs, landscape features and flagpoles. Bullet fixtures are ideal for this application.
Outside Lights: Path Lighting
Path lighting uses low fixtures, which direct illumination downward and outward.
These fixtures are shielded on top to prevent flare. They are used along paths, stairs and anywhere else that safe night access is required. Resist the tendency to “over light” and be very aware of light spill.
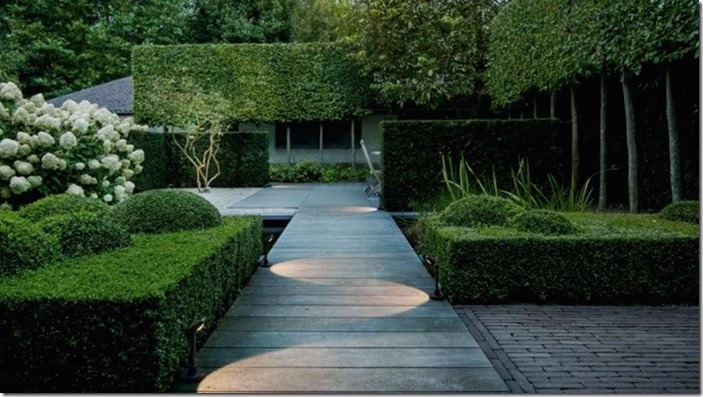
This image is the closest I have seen to the perfect path lighting. The fittings are disguised by the hedging. There is no unnecessary lit spill and the designer has taken full advantage of the beauty of the separate circles of light generated without overlap.
Path lights are commonly used for small pathways, walkways, flowerbeds and ground cover areas, with a spacing of at least 2-3m.
Outside Lights: Backlighting
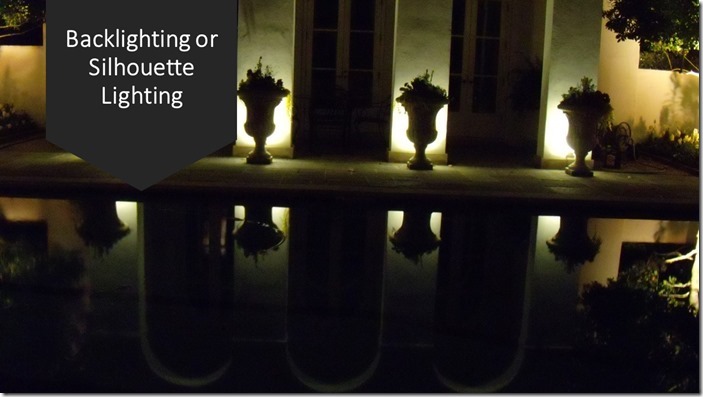
Backlighting is a technique where an aura or corona is generated around an object by projecting a light onto the back of it. Most of the direct light is blocked from view by the object itself, but some of the light leaks around to outline the object with a “glowing” effect.
Outside Lights: Shadowing or Silhouette Lighting
Shadowing or silhouette lighting differs from backlighting, as the light is not pointing directly at the object, but instead by illuminating objects in front a fairly large surface (like a wall) using a wide flood or wash light fixture. This causes objects in front of the lighting to appear as silhouettes. An example of this would be generating a large shadow or silhouette of a small sculpture on a wall.
Outside Lights: Underwater Lighting
Lighting of swimming pools can add a dramatic effect. But lighting ponds, fountains and waterfalls should be avoided. Primarily because the majority of the time you are just illuminating algae.
If you insist on underwater lighting the water ideally needs to be chlorinated or you should expect to be underwhelmed.
When dealing with a submerged light source, expected results may differ from the actual effect.
There are 3 main conditions that will modify or change your beam spread as well as light intensity.
These are:
· Depth: the deeper the water, the more the light will widen or spread. Not recommended for applications deeper than 4 feet. The impact or effects will be greatly reduced.
· Clarity: clean or clear water will produce maximum quantity of light. Alga will reduce the light dramatically. The cloudier the water, the more wattage or tighter beam spread will be needed to see the impact of the light source and its effect.
· Movement: water movement will distort or increase the beam spread. The top of the water acts as the lens. Clear lens or no movement, the beam will remain truer and more accurate. The more movement, the larger increase in spread, not to mention constant light movement.
If you want to light a pond light it from above and that way you will create a mirror effect casting beautiful reflections of surrounding plants of features.
Outside Lights: Low Voltage Light Fittings
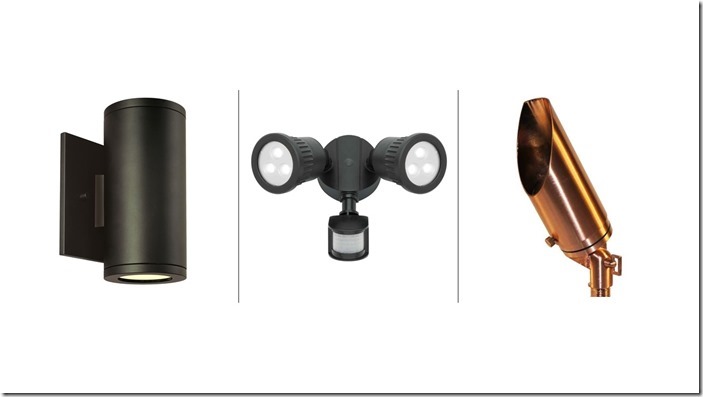
The main type of low voltage landscape fixtures are: spot (bullet), flood, path, well, step or brick, underwater, accent, and post lights.
In addition, LED products to include light bars and roping useful in special applications. but I will confine this lecture to discussing the “normal” types just listed.
Outside Lights: Materials & Finishes
Before I get into the details of each type of fixture, let’s discuss available materials and finishes. Fixtures come in a wide array of styles but are usually either painted or anodized metal or plastic. Typical metal finishes are black, white, Stainless Steel, brass, and copper
Plastic fixtures are usually cheaper and less resilient, usually confined to black or white. Spots and well-light fixtures have proper gaskets and are covered with a lens to ensure being weatherproof or waterproof.
Most accent and path lighting are the same with the possible exception of some tulip shaped path lighting that points downward.
Outside Lights: Understanding IP ratings
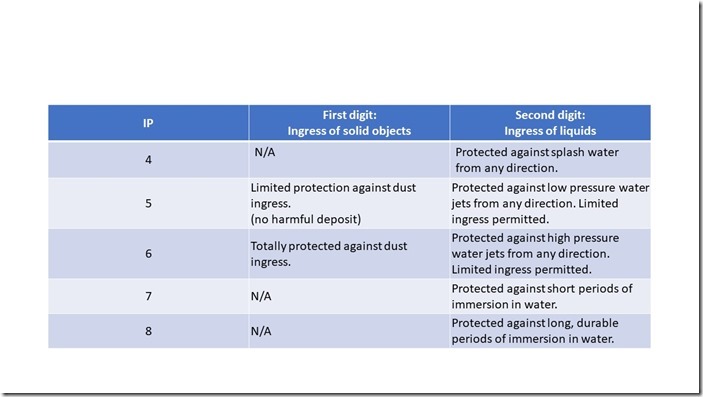
The IP rating is a two-digit number defined in international standard EN 60529 (British BS EN 60529:1992, European IEC 60509:1989) and established by the International Electro-Technical Commission.
It is used to provide an Ingress Protection rating (dust and water) to a piece of electronic equipment. It’s important to understand this rating as specifying the wrong fitment, could result in the unit failing or even possible electrocution
The IP number is made up of two digits representing different forms of environmental influence:
· The first digit represents protection against ingress of solid objects.
· The second digit represents protection against ingress of liquids.
The IP numbers that affect landscape design are between 4 & 8.
There are plenty of outside lights on the market with an IP of 54 which is the minimum IP rating you should use.
IP54 would provide limited protection against dust, and protected against splash water from any direction. These units tend to be cheaper. I tend to avoid them, as they are unlikely to last a couple of years outside. Unless given additional protection such as a porch or covered overhang.
Next, you will see IP65 and IP67. These are the units that should last more than 3 years. They are often a little more expensive but in my opinion worth the extra investment.
Finally, you may come across IP 68 for underwater lighting for swimming pools and ponds
Outside Lights: Lamp or Bulb Types
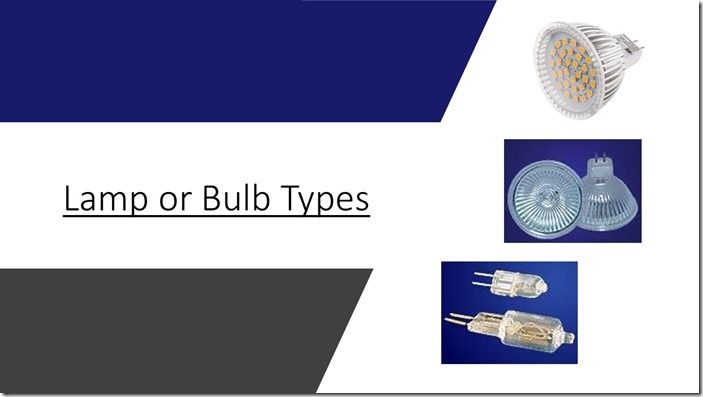
There are three main lamp configurations used in low voltage landscape lighting; 2-pin (G4), MR-11 (GZ4) and MR-16 (GU5.3). These can be further divided into halogen (ambient) or LED. Type numbers in brackets indicate LED series numbers equivalent to the halogen series numbers shown. The following pictures from bottom to top show the 2-pin bulb, the MR-11 bulb, MR-16 GU5.3 LED.
The MR-11 and MR-16 bulbs are almost identical in appearance except for their size of the reflector with the MR-16 bulb being larger at 51mm and the MR11 at 35mm.
All three types are a 2-pin configuration and are in theory, interchangeable if the fixture can hold them. 2-pin and MR-11 bulbs can fit in MR-16 compatible fixtures but going the other way might be more challenging.
Outside Lights: Beam Angle
The next most important decision is which beam angle to choose. The beam angle can vary hugely from a tight spotlight at 7° to 60° for Incandescent lamps. And a flood light of up to 120° for some LED’s
MR16 lamps can also be identified by a three-letter code created by the American National Standards Institute (ANSI). The three-letter code represents a specific type of lamp identified by its wattage, bulb shape, and beam angle. For example, “EXN” stands for 50 watts, MR16 lamp, 40 degrees or 50MR16/40°.
Lighting professionals can specify MR16 lamps by their ANSI code or by their wattage, bulb shape, and beam angle interchangeably. The table on the right shows a partial list of ANSI three-letter designations and their abbreviated descriptive equivalent.
Beam angles are specified in two ways: by the number of degrees (for example, 40 degrees), or by nomenclature that describes the lighting effect produced by the reflector lamp.
The National Electrical Manufacturers Association (NEMA) categorizes MR16 lamps as either spot lamps or flood lamps. Some lamp manufacturers have created subcategories to better capture the ranges of beam angles. I strongly advise you avoid cheap imported lamps and stick to the main manufacturers like GE, OSRAM and Philips
Beam Angle is one of the most important decisions you will make. It will have a massive effect on what you are trying to light and can make or break your installation.
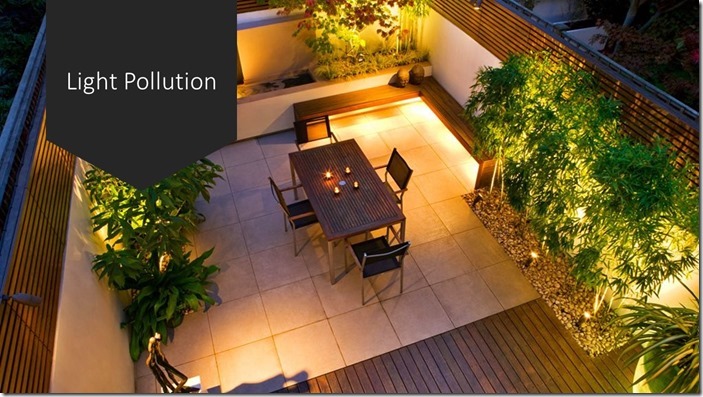
Light Pollution
You want to avoid both too wider spill and too brighter lamp to avoid light pollution and upsetting your neighbours
In the UK councils must look into complaints about artificial light from premises if the light could be classed as a ‘statutory nuisance’ (covered by the Environmental Protection Act 1990).
For the artificial light to count as a statutory nuisance it must do one of the following:
• unreasonably and substantially interfere with the use or enjoyment of a home or other premises
• injure health or be likely to injure health
While security lighting is the main cause of complaints, decorative lighting of buildings or landscapes can also come under the heading of Statutory nuisance so careful placement of fittings and the choice of lamps is very important
As I said at the beginning of this lecture Over-lighting a garden is one of the biggest mistake people make.
To avoid unnecessary light spill, consider fitting honeycomb glare louvre to the front of the fitting or glare shields like the one on the right. Also, have your outside lights on Dimmer switches and consider carefully the lamp strength and beam spread.
Colour Temperature
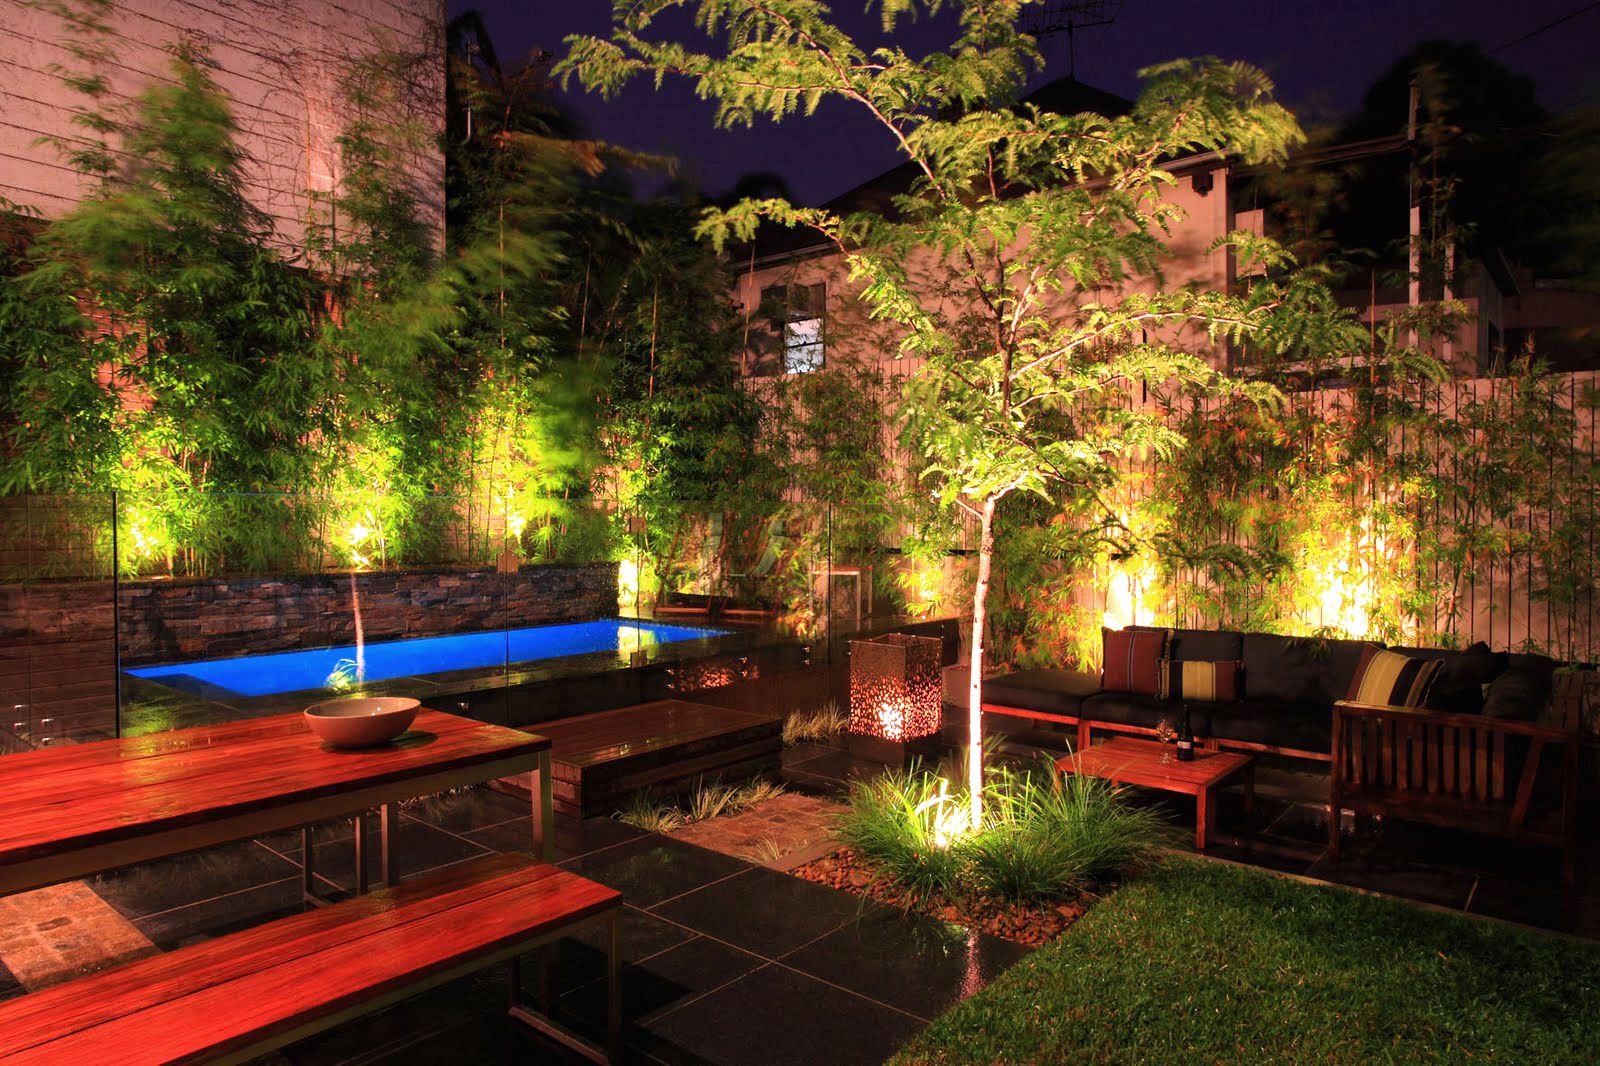
When I talk about the colour of light I am not talking about coloured lights per say. Although it would take quite a brave person to install an outside lighting scheme like this?
I am talking about Colour temperature.
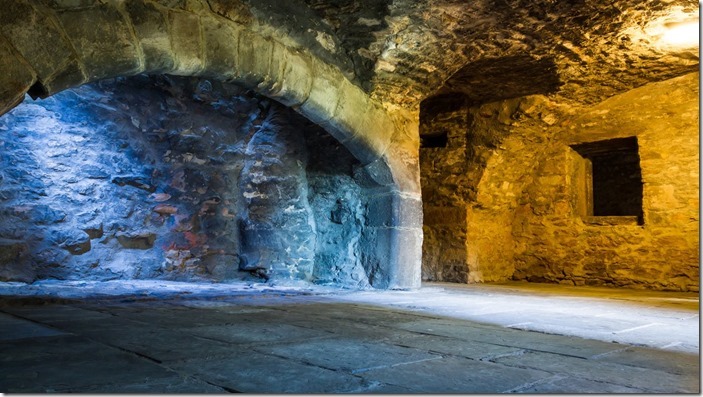
Not all lamps emit the same colour of light. For many years LED lighting was only able to emit a very cold blue light of around 6000K while traditional light bulbs omitted a much warmer yellower light of around 2600-3000K
As you can see the difference between the cold light on the left compared with the much warmer light on the right
Today even LED’s can offer this warmer option
My advice is always to use the warmer lamps and avoid the cooler blue light. It may look trendy and modern, but I think most people to tire of it very quickly. The golden rule is if you wouldn’t have it inside, then don’t have it outside
The only exception to this is when lighting conifers and some evergreens. Here, colder light can look better on dark green or even blue foliage.
See Also GARDEN LIGHTS: HOW TO DESIGN A GARDEN LIGHTING SCHEME PT.II
OUTDOOR LIGHTING: HOW TO DESIGN A GARDEN LIGHTING SCHEME PT. III
For more information on professional garden design, planting and CAD check out our online courses at the Oxford College of Garden Design

